Certainly! Upgrading your computer’s memory (RAM) can significantly improve performance and multitasking capabilities. Whether you’re dealing with a desktop PC or an iPhone, I’ve got you covered. Let’s dive into the step-by-step process for both scenarios:

Upgrading Desktop PC Memory (RAM)
1. Gather Supplies:
- Clear off your installation space and ensure you’re in a static-safe environment.
- You’ll need:
- Your desktop computer.
- Crucial® desktop memory.
- A screwdriver.
- Your owner’s manual (for reference).
- Memory installation supplies.
2. Disconnect Power:
- Unplug your desktop PC from the power source
3. Handle Memory Safely:
- Always touch an unpainted, grounded metal object or use an antistatic wrist strap to prevent electrostatic discharge.
- Handle the memory module by its upper corners, avoiding the Integrated Circuit (IC).
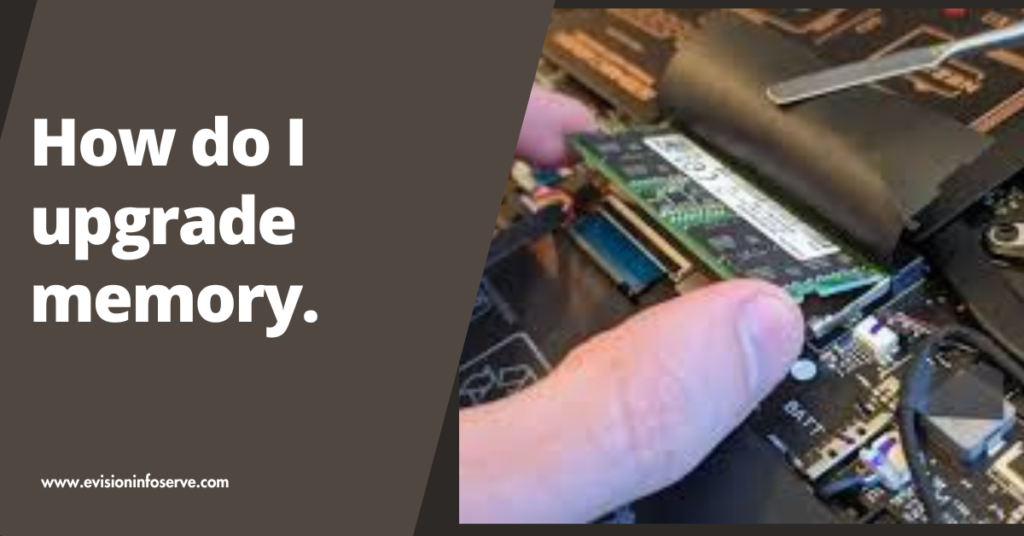
4. Locate Memory Slots:
- Refer to your motherboard’s manual to find optimal sockets for 2x or 4x module installation.
5. Install the Memory:
- Align the memory module with the slot and gently press it down until the clips on both sides snap into place.
- Make sure it’s securely seated.
6. Reassemble and Power On:
- Reattach any removed components (if applicable).
- Plug in your PC and power it on.
- Check if the new RAM is recognized by going to Task Manager (Ctrl+Shift+Esc) and viewing the Performance tab.
Upgrading iPhone Memory
1.Determine Your iPhone Model:
- Go to Settings > General > About to find your iPhone model number.
2.Gather Tools:
- You’ll need:
- A small Phillips screwdriver.
- A plastic prying tool or flat, non-metal tool.
- A replacement memory module compatible with your iPhone model.
3. Back Up Your iPhone:
- Use iCloud or iTunes to back up your data.
4.Turn Off Your iPhone:
- Hold down the power button and slide the power off slider.
5. Remove Screws:
- Use the Phillips screwdriver to remove screws from the bottom of your iPhone.
6. Open the iPhone:
- Carefully use the prying tool to loosen the casing and remove it.
7. Locate the Memory Module:
- Find the small rectangular memory chip attached to the motherboard.
8. Replace the Memory Module:
- Gently push the tabs on either side to remove the old module.
- Install the new memory module securely.
9. Reassemble Your iPhone:
- Follow the steps in reverse order to put everything back together.
- Tighten screws and replace any missing ones.
10. Power On and Verify:
- Turn on your iPhone and check if the new memory module is recognized in Settings > General > About.
Remember, take your time, follow instructions carefully, and seek professional help if needed. Upgrading memory can breathe new life into your devices!
FAQ's
- Restart your device. …
- Try other browsers. …
- Clear RAM cache. …
- Update software to the latest versions. …
- Delete unused extensions. …
- Use optimization software.
- Disable bloatware.
- Delete photos and videos.
- Temporarily disabling apps.
- Remove unwanted downloads.
- Delete Useless Apps.
- Transfer Data to Cloud..
- Get yourself a High-speed micro SD card of 64GB, it won’t be that cheap. Insert it in your device’s SD slot, navigate to settings>storage> format SD card as internal storage. This will format your high-speed card as internal storage, so that way you will get 128GB of internal storage. disabling apps.
- Remove unwanted downloads.
- Delete Useless Apps.
- Transfer Data to Cloud..